
Are you considering installing a fence around your property but worried about the cost of hiring professionals? With a bit of planning and some elbow grease, you can achieve a professional-quality fence installation with a DIY approach. In this guide, we'll share some valuable tips and experts fencing Kapiti Coast tricks to help you get the job done right.
- Plan Your Project
Before you start digging post holes, take some time to plan your fencing project. Consider the following:
- Purpose: Determine why you need a fence. Is it for privacy, security, or to enhance the appearance of your property?
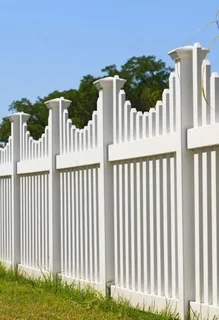
- Materials: Choose the right type of fencing material for your needs and budget. Options include wood, vinyl, metal, and composite materials.
- Design: Decide on the style and height of your fence. Consider tree removal Kapiti services factors such as your property's layout, local building codes, and neighbourhood regulations.
- Gather the Necessary Tools and Materials
To ensure a smooth installation process, make sure you have all the tools and materials you need. Here's a basic list to get you started:
- Fencing materials: Posts, panels, rails, and hardware
- Tools: Post hole digger, level, tape measure, saw, drill, hammer, and safety gear (gloves, safety glasses, etc.)
- Prepare Your Site
Proper preparation is essential for a successful fencing Kapiti Coast installation. Follow these steps to prepare your site:
- Mark the Fence Line: Use stakes and string to mark the perimeter of your fence. Make sure the lines are straight and the corners are square.
- Check for Utility Lines: Before digging, call your local utility company to mark the location of underground utility lines.
- Clear the Area: Remove any obstructions such as rocks, roots, or vegetation along the fence line.
- Set Your Posts Correctly
The key to a sturdy fence is properly set posts. Follow these tips for setting your fence posts:
- Dig Deep Holes: Dig post holes to the depth recommended for your fence type and local building codes.
- Use Gravel: Place a few inches of gravel in the bottom of each post hole for drainage.
- Check for Plumb and Level: Use a level to ensure your posts are plumb (vertical) and level (horizontal) before securing them in place.
- Install Your Fence Panels
Once your posts are set, it's time to install your fence panels. Follow these steps for a professional-quality installation:
- Measure Twice, Cut Once: Measure the distance between your posts carefully before cutting your fence panels to size.
- Use Quality Hardware: Invest in high-quality screws and fasteners to secure your fence panels to the posts.
- Check for Level: Use a tree removal Kapiti-wide to ensure your fence panels are straight and level as you install them.
- Add Finishing Touches
Once your fence panels are in place, add any finishing touches such as post caps or paint/stain to protect and enhance the appearance of your fence.
Conclusion
With the right tools, materials, and know-how, you can achieve a professional-quality fence installation with a DIY approach. Follow these tips and fencing Kapiti Coast tricks for a successful project that will enhance the appearance, security, and value of your property for years to come.